Video Guide: How to create a CASCON project
Create a new CASCON project
Create a new CASCON project.
This guide will walk you through the process of creating a new CASCON project.
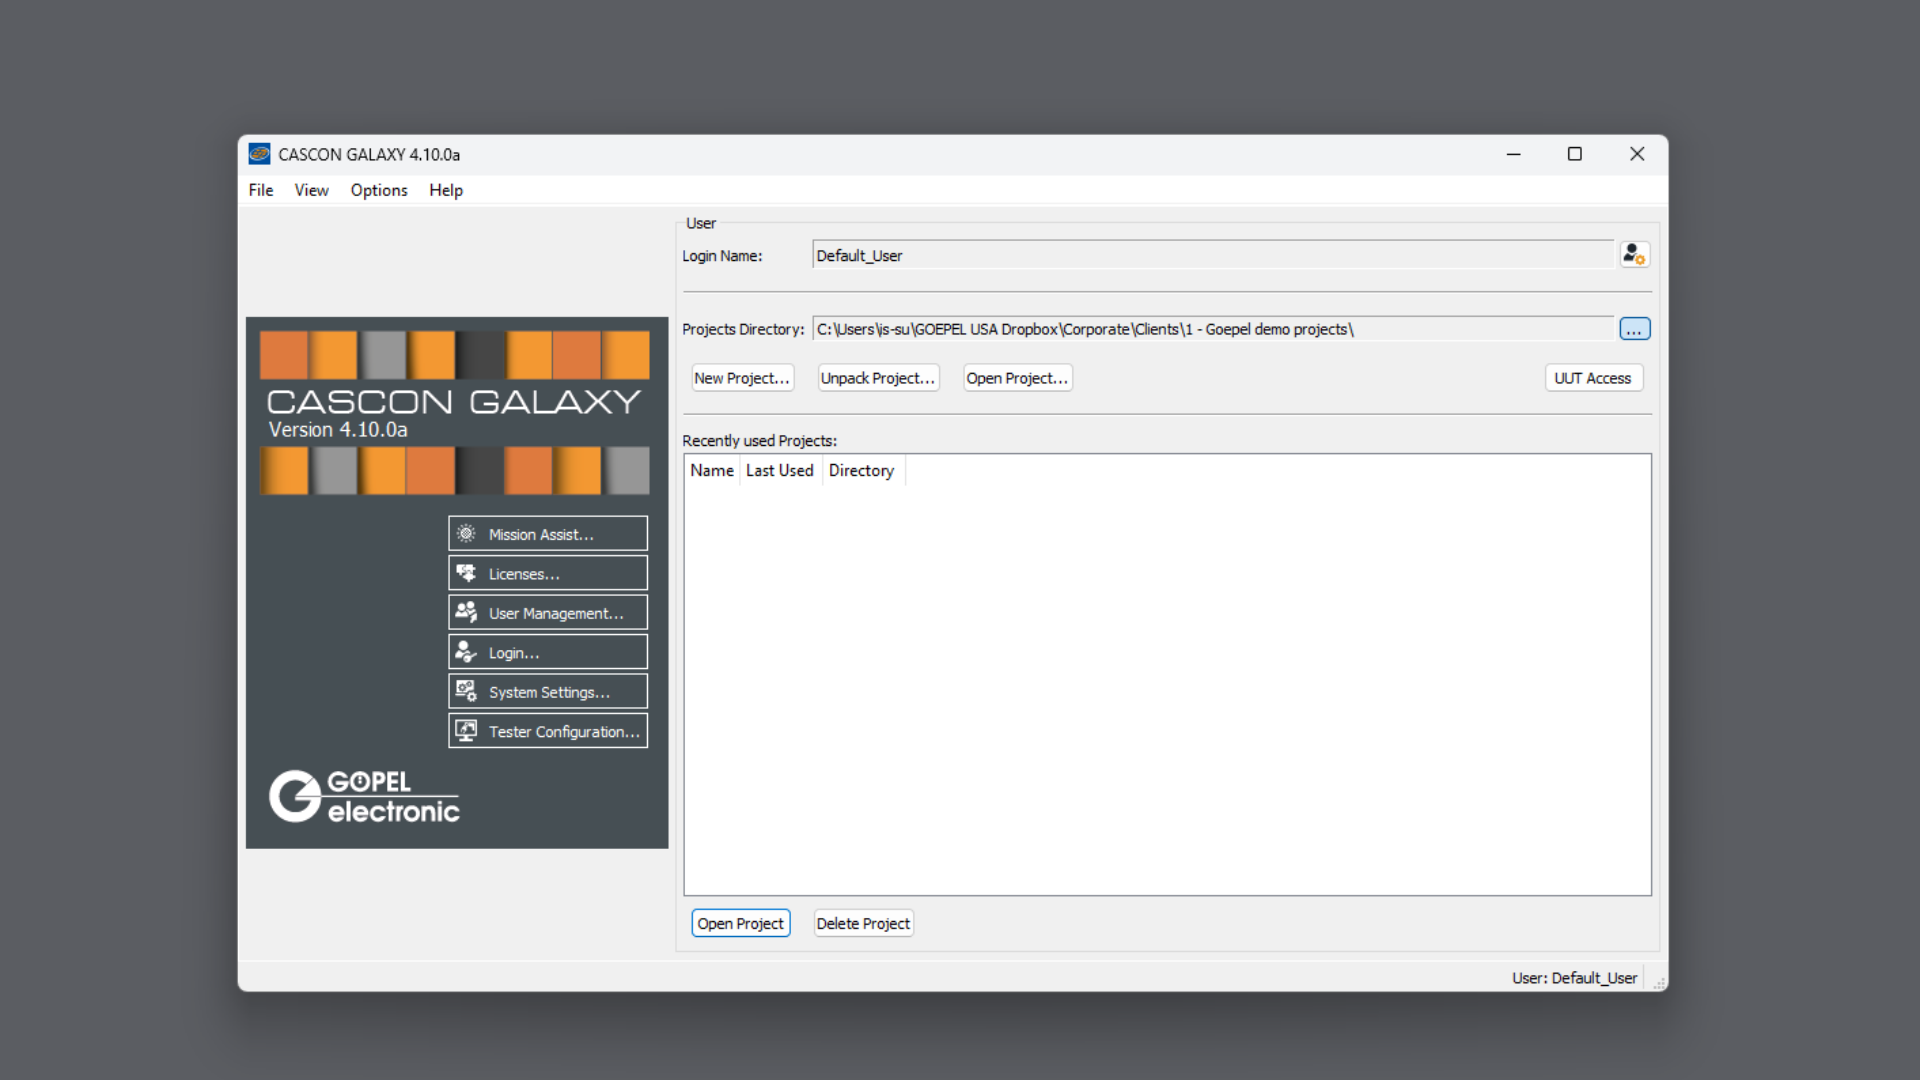
1. Open the CASCON Administrator Window
If the CASCON software is not open already, open it now. To create a new project, switch to the CASCON Administrator window.
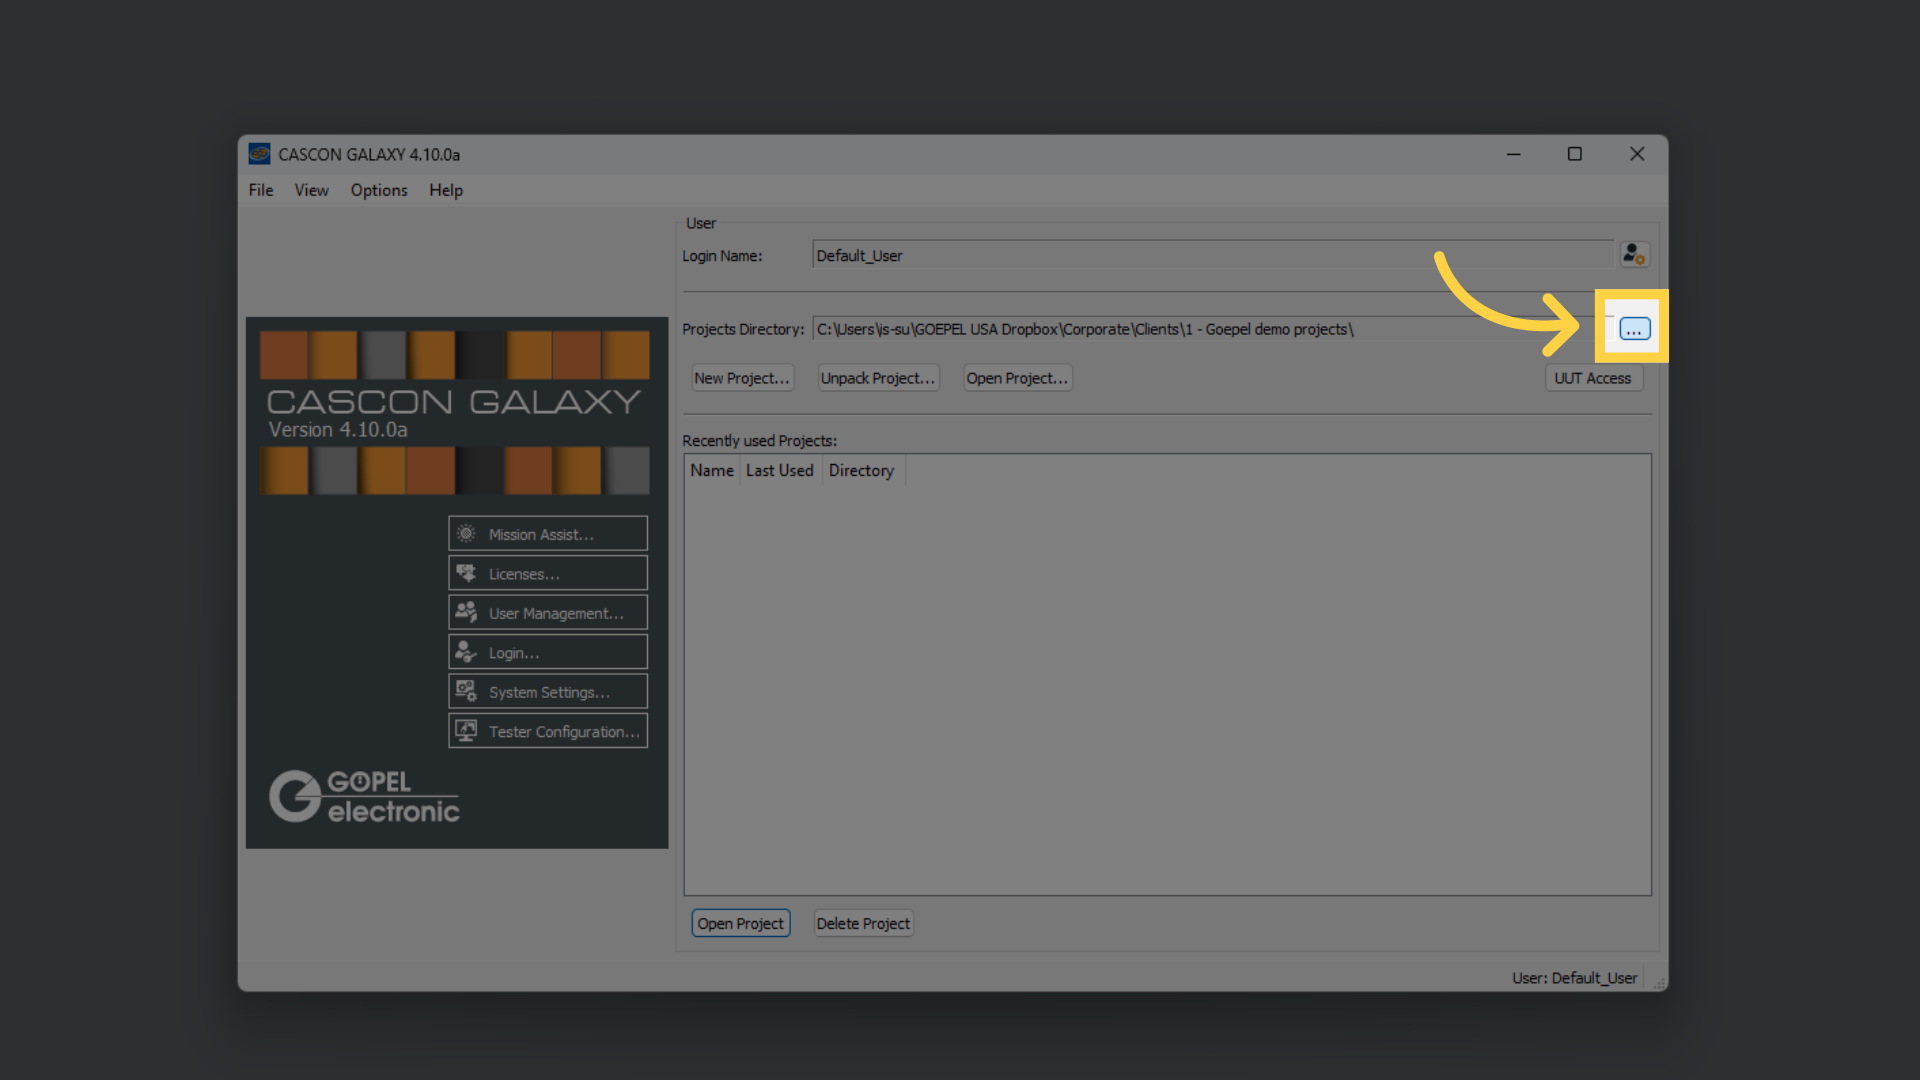
2. Click "..."
If you want to change the location where the project should be stored, click on the ellipsis icon next to the "Projects Directory" field.
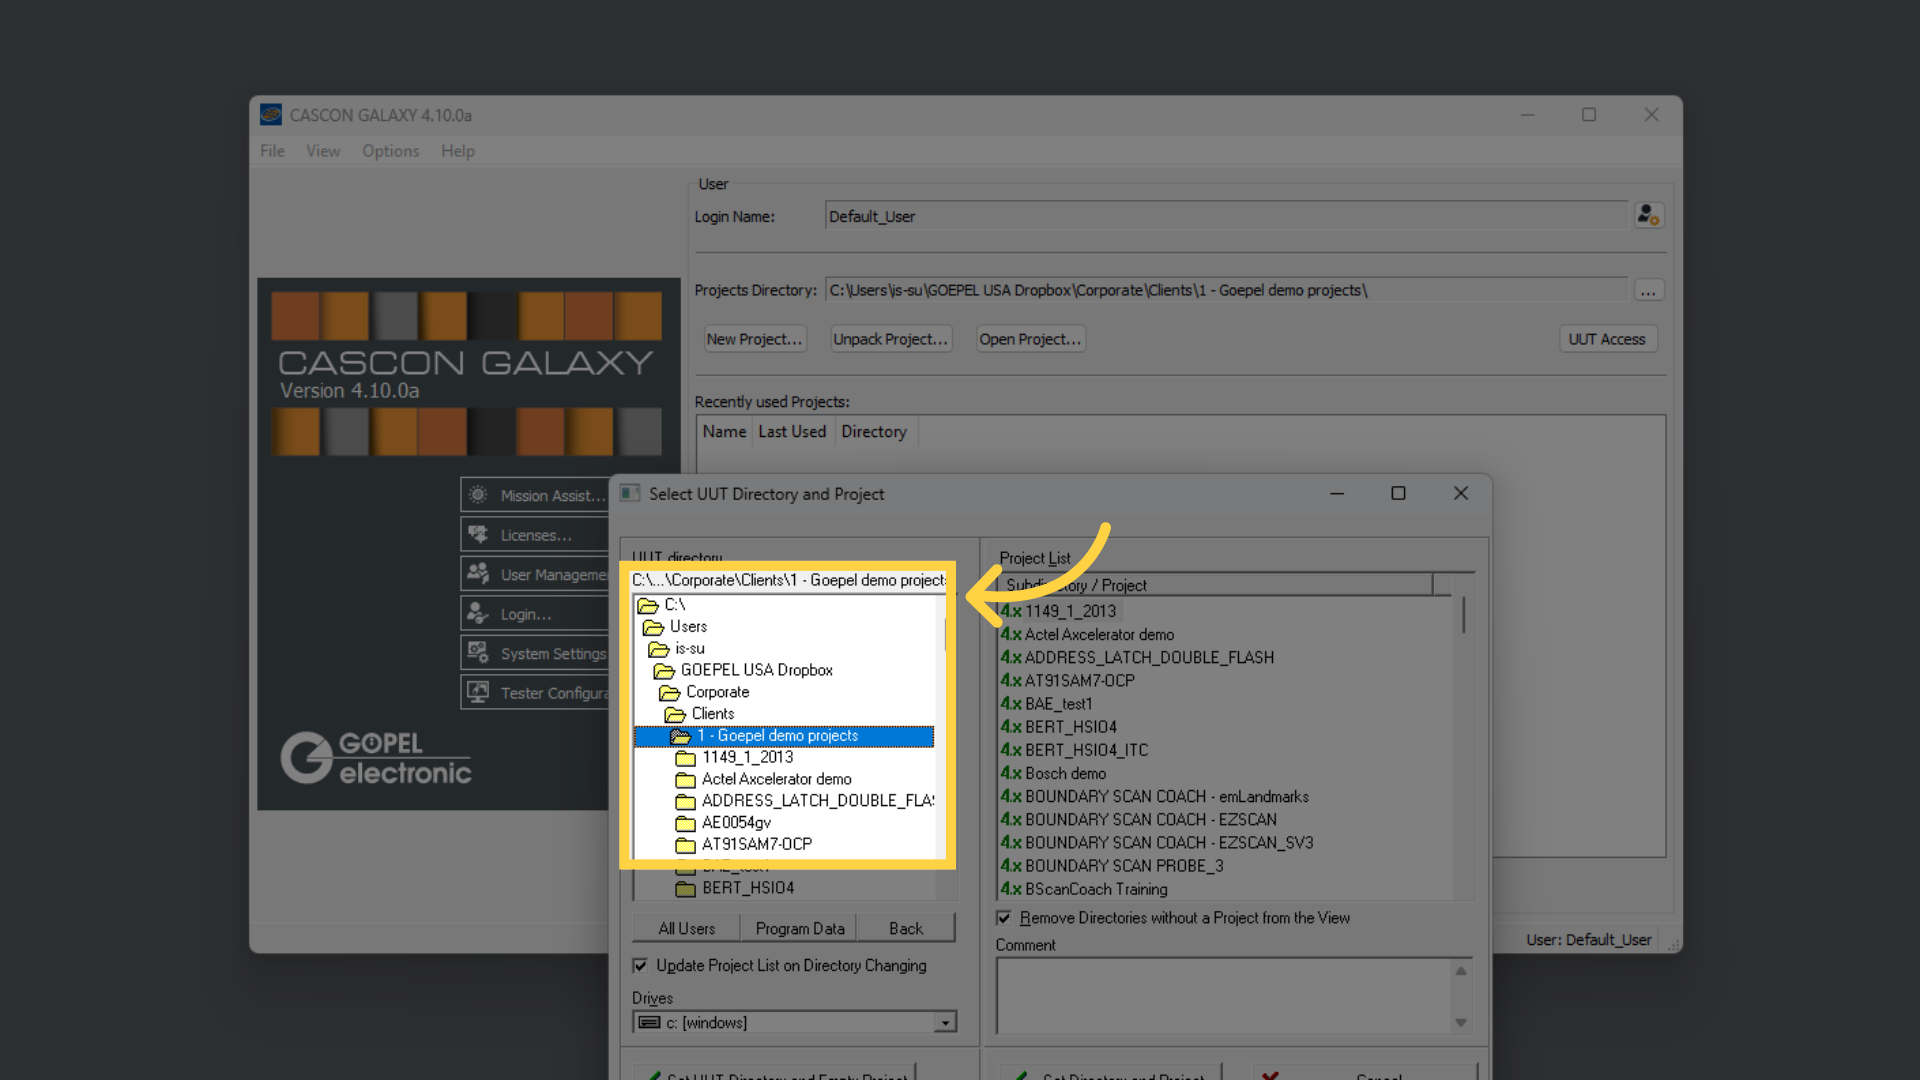
3. Browse to the target directory for the project
Browse to the location in which this new project shall be stored. Note: if you don't see this dialog you may want to change the CASCON user settings to allow you to change the project directory.
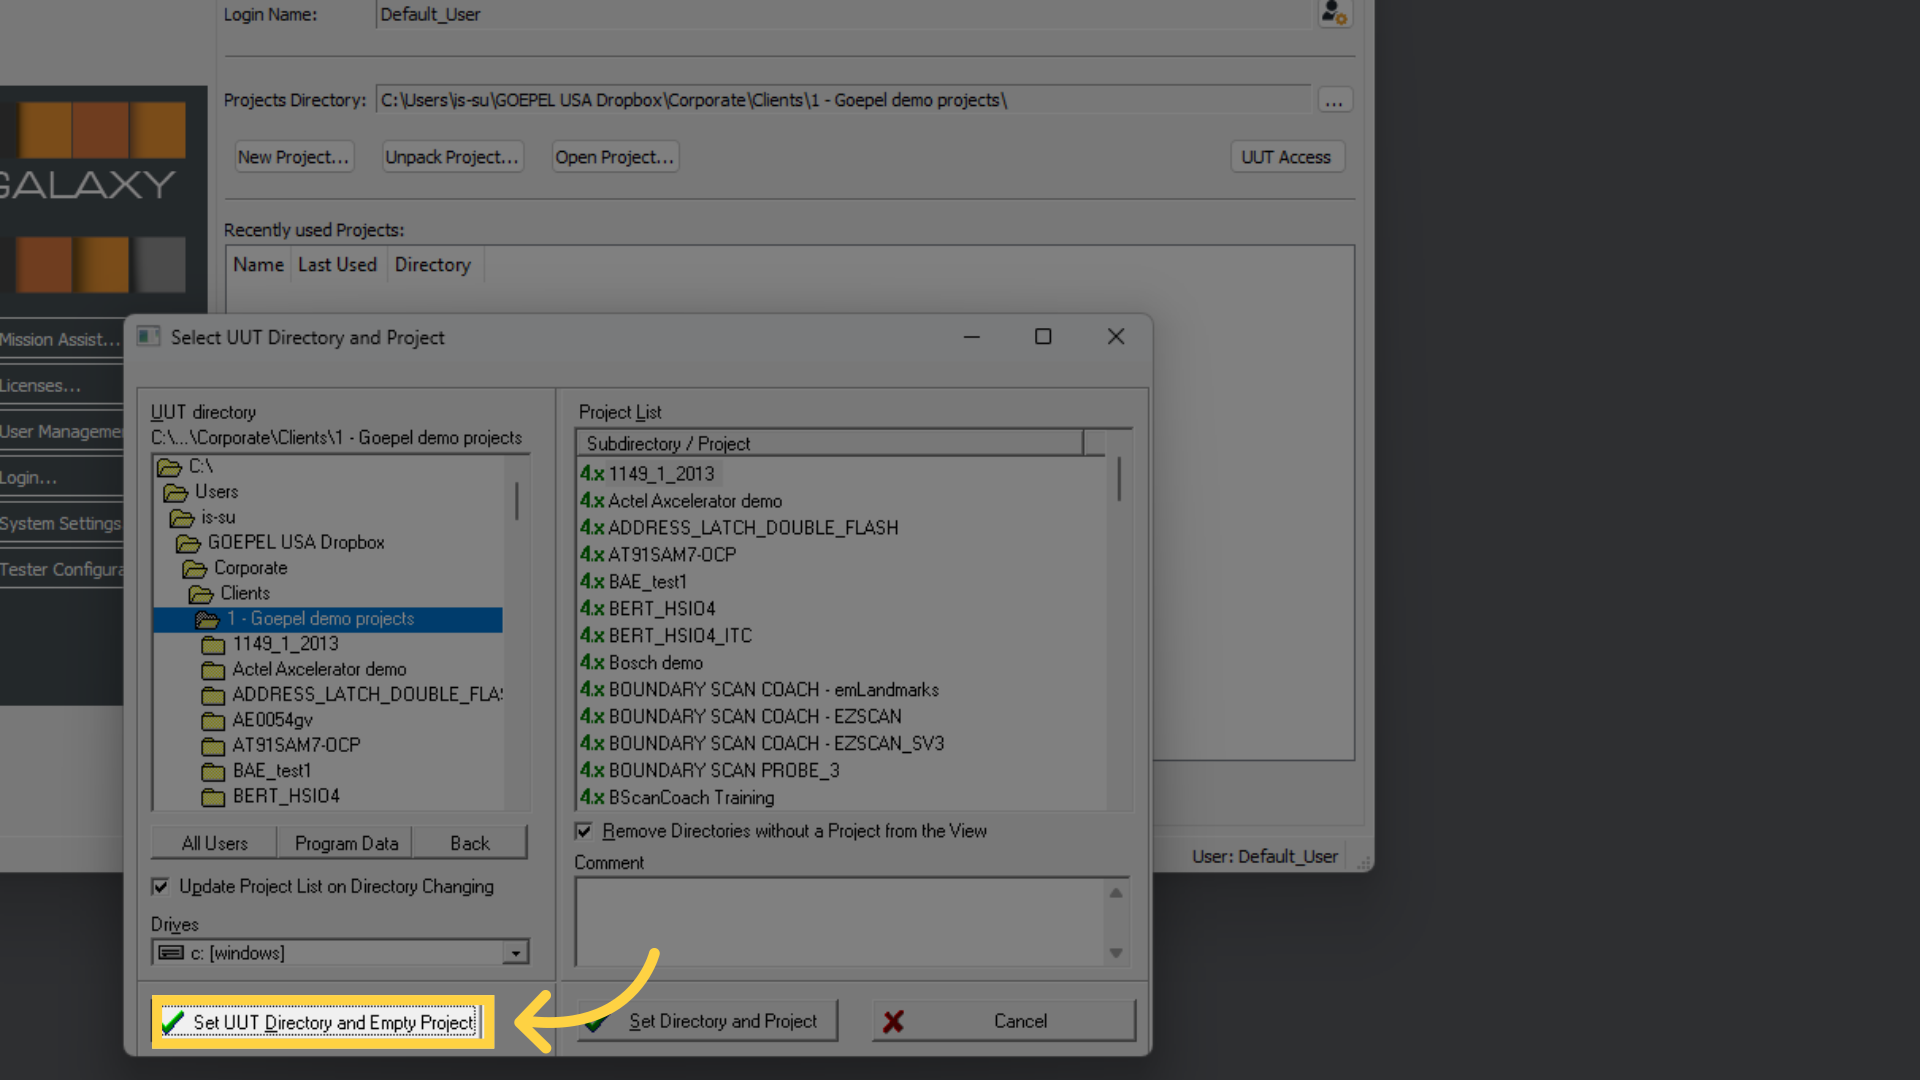
4. Click "Set UUT Directory and Empty Project"
Then close this dialog with "Set UUT Directory and Empty Project."
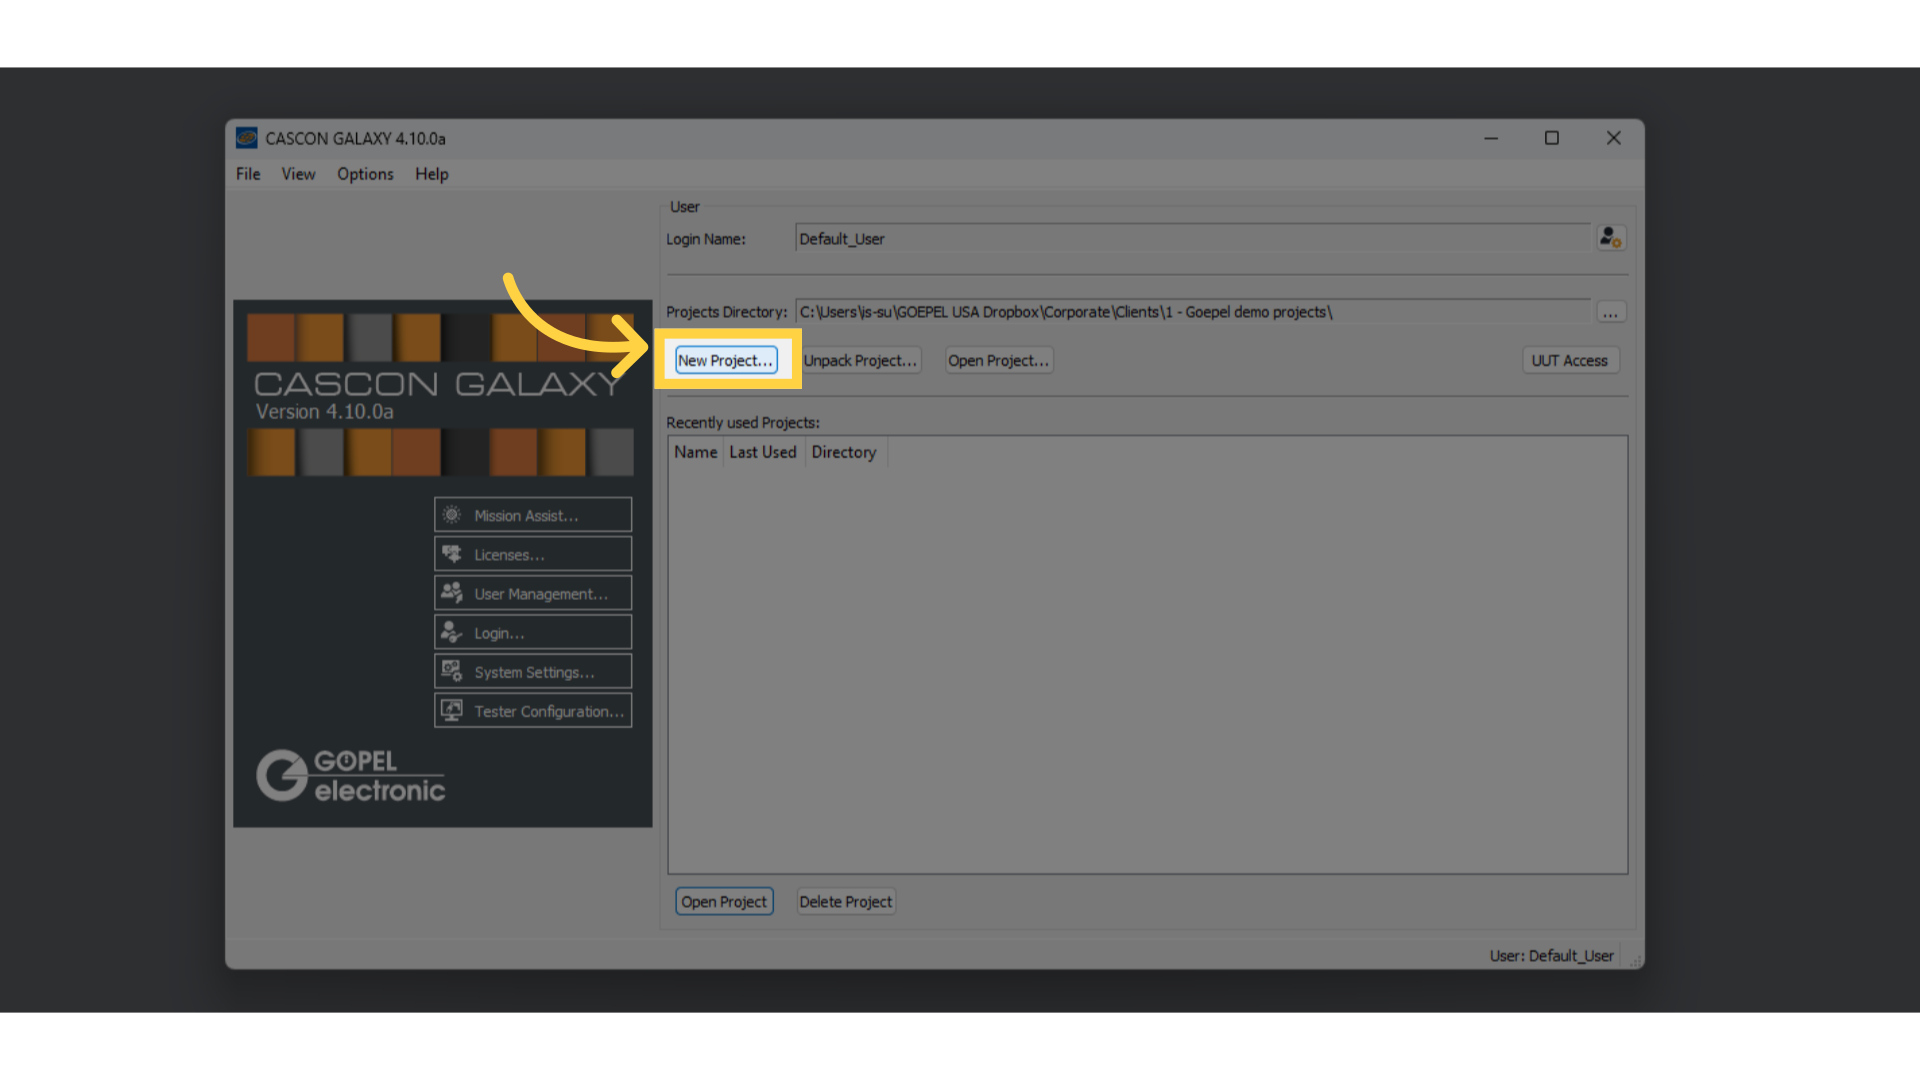
5. Click "New Project..."
Now select "New Project.
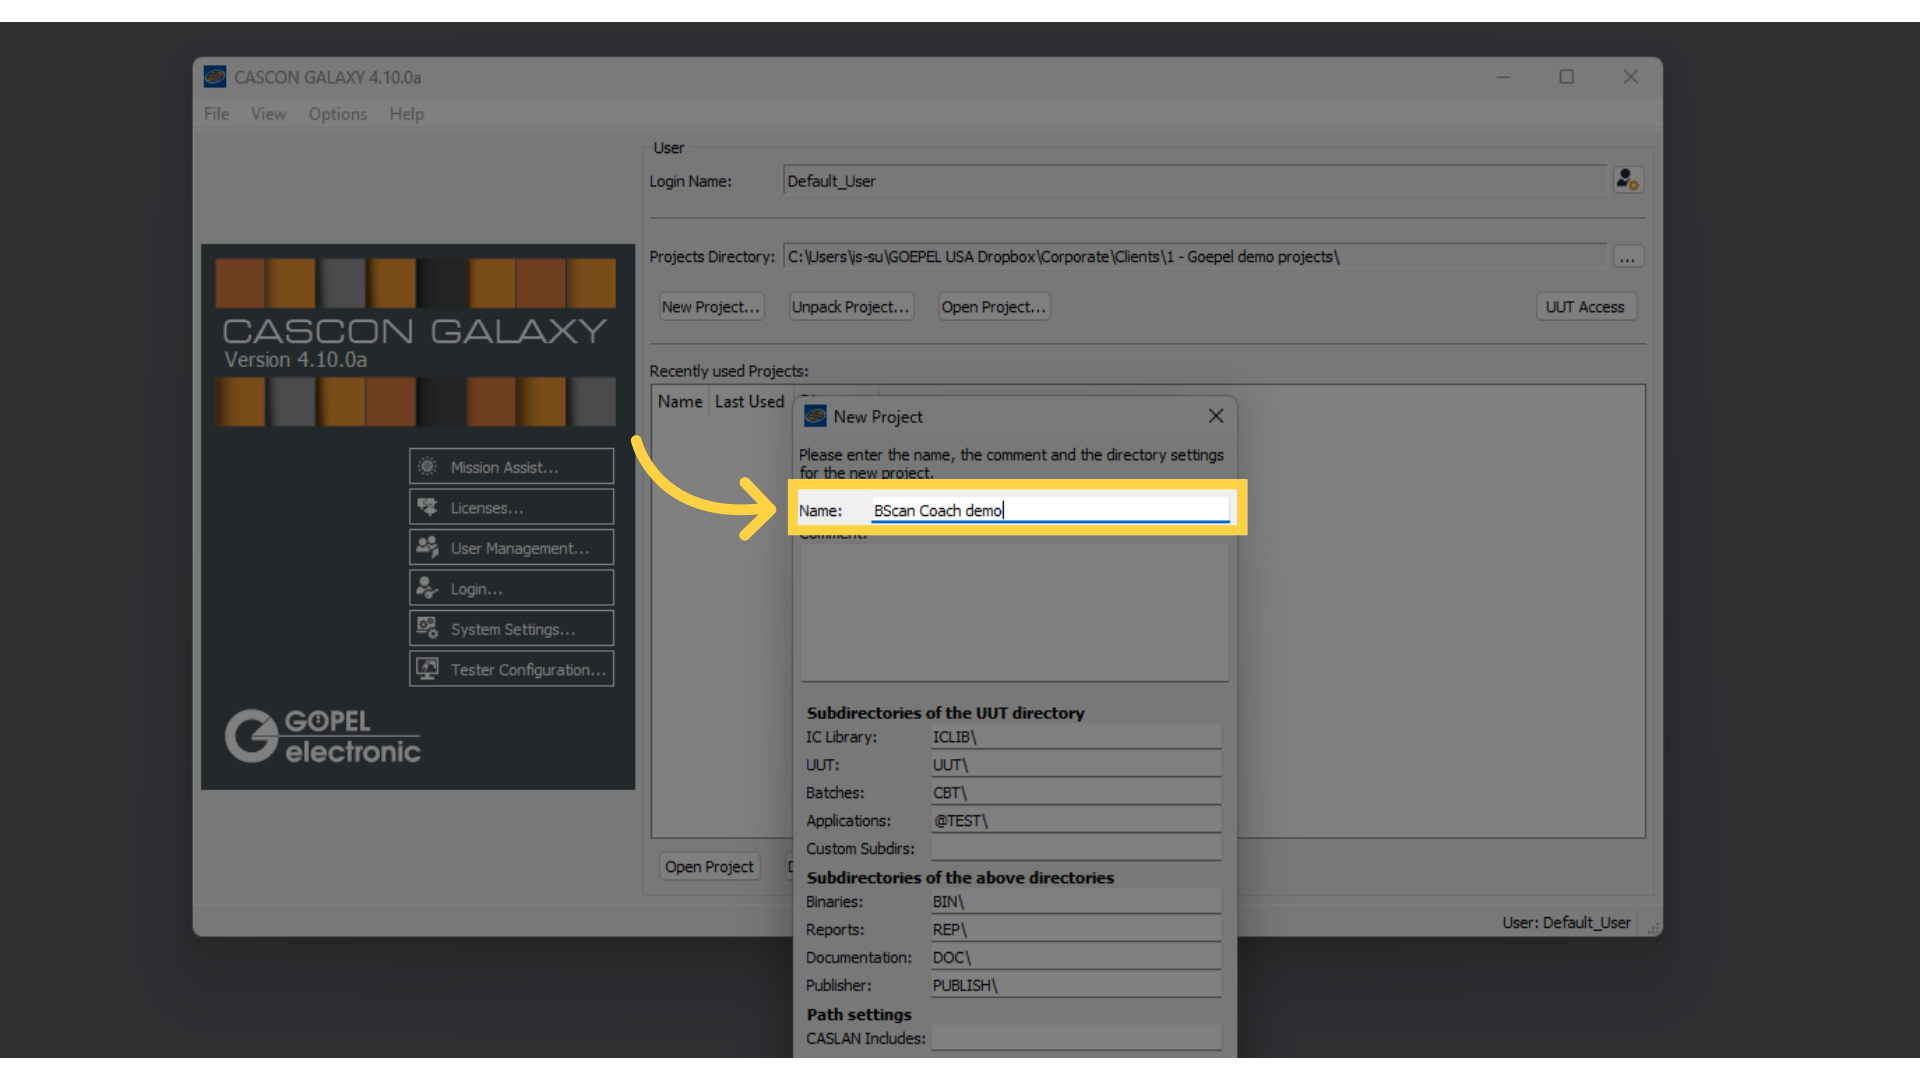
6. Provide the project name
Put the cursor into the Name field and type in the desired project name, such as "BScan Coach demo".
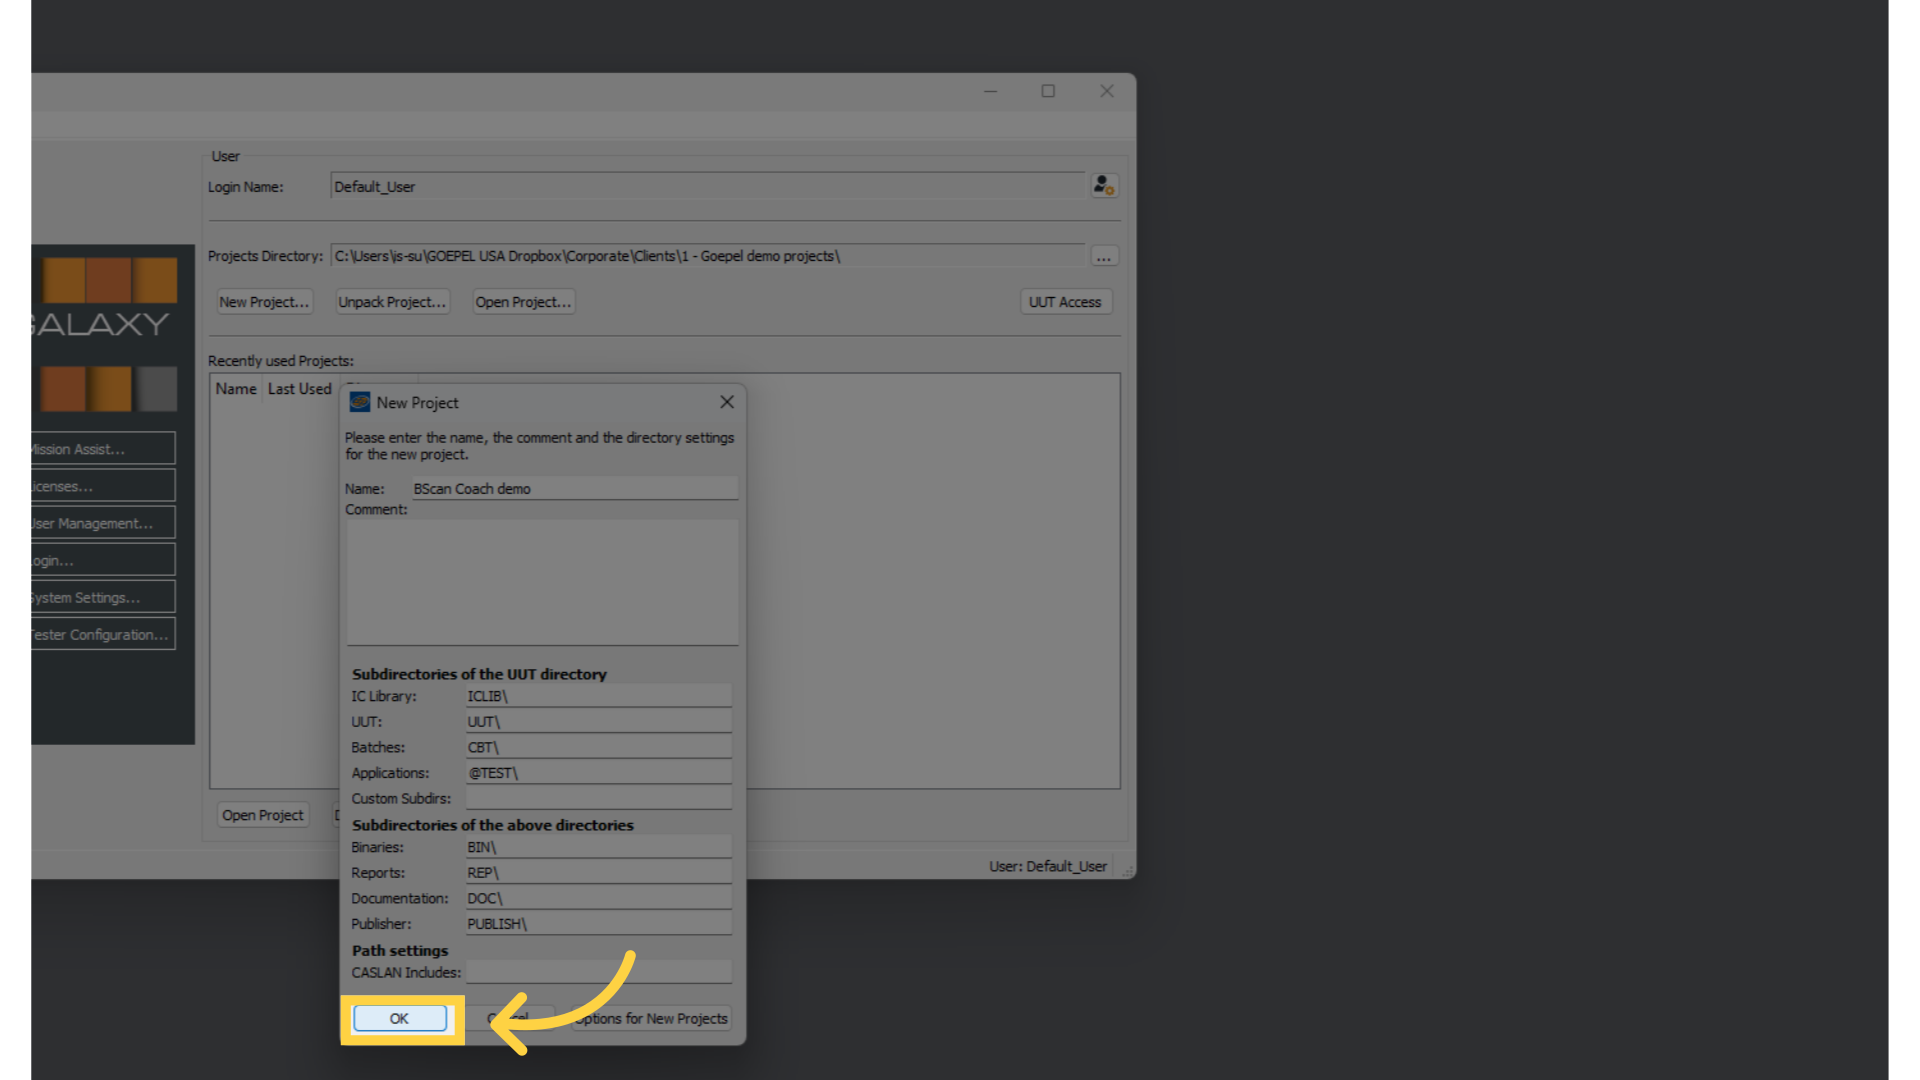
7. Click "OK"
Click on "OK" to confirm.
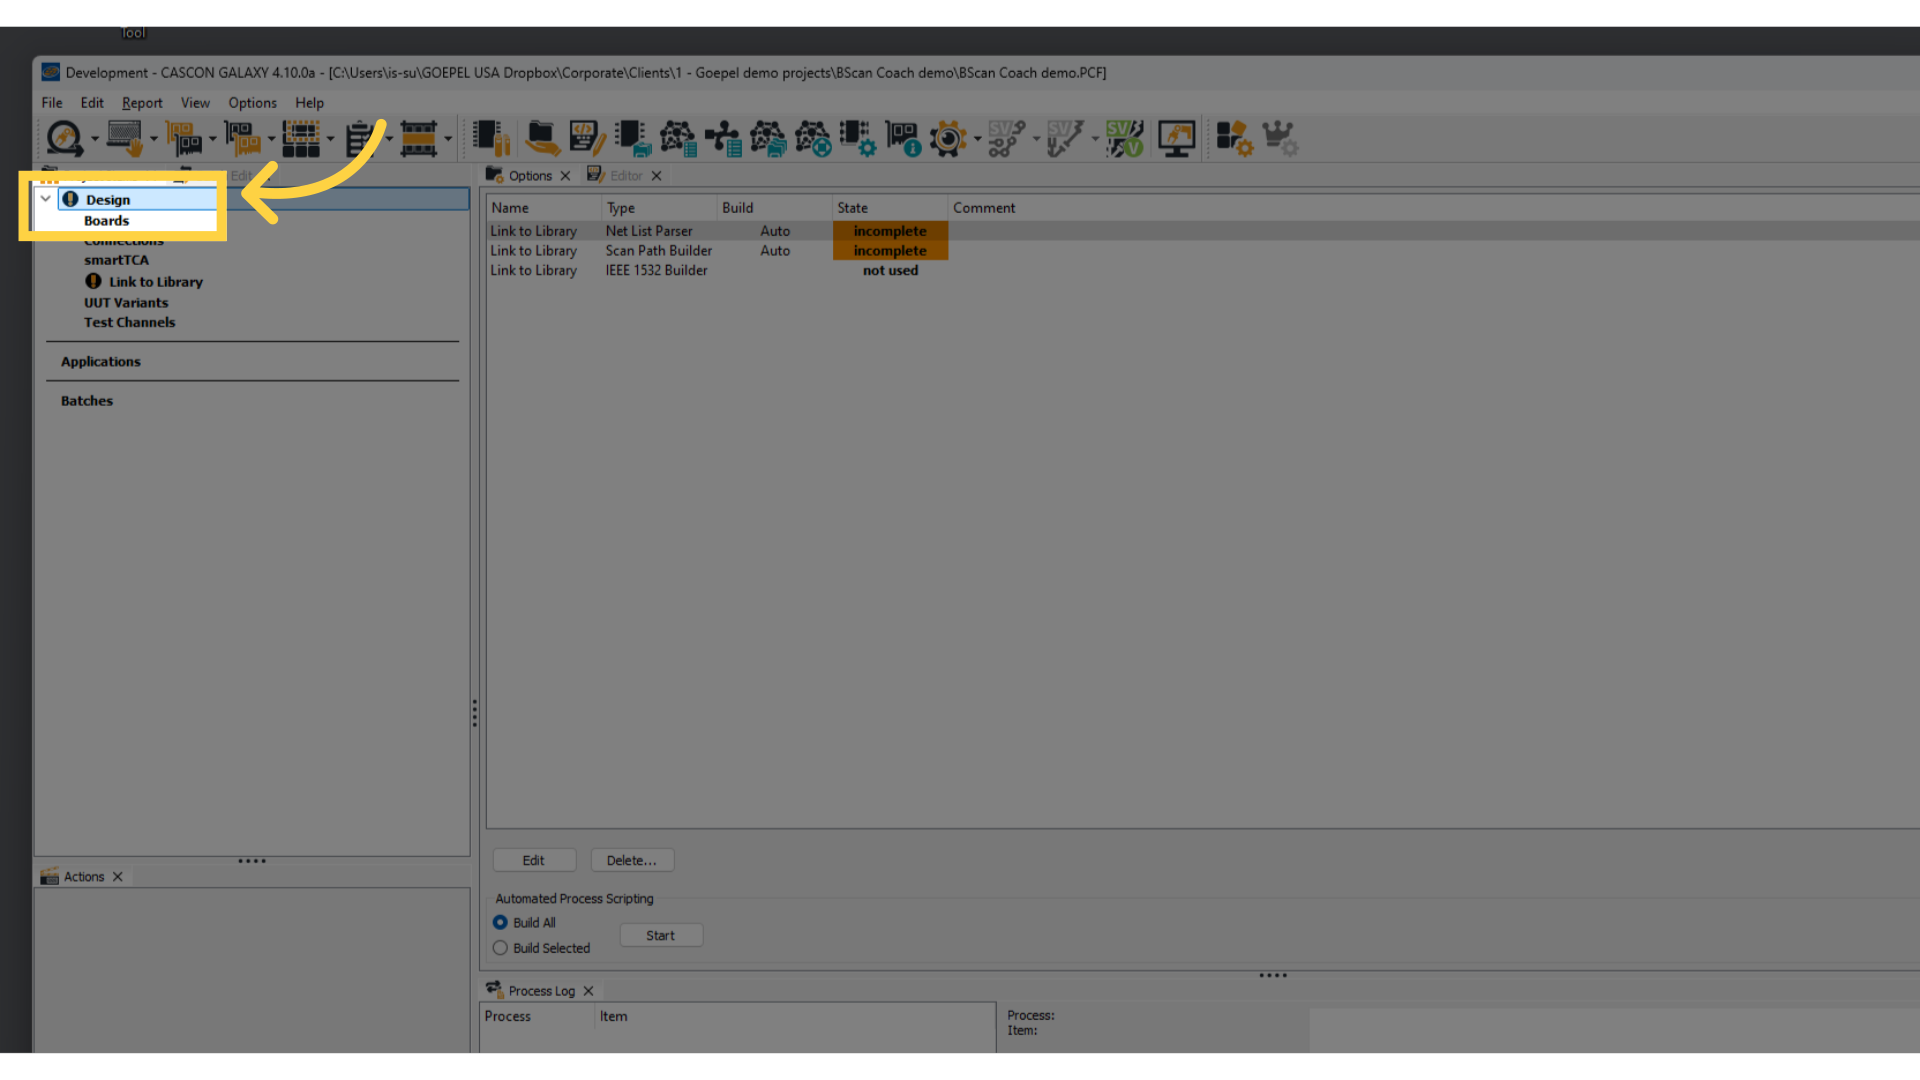
8. To import CAD data, continue here
The CASCON project development window opens. CASCON created the underlying directory structure in the background. Typically, the next step would be to import the U U Ts board data, such as netlist and bill of material.
This guide covered creating a new CASCON project by setting the project directory and providing the name for the new project. Check out our other video guides to learn about specific CASCON features and tools. And most importantly, ... Enjoy testing. GOEPEL USA Support Portal
